Peanut Butter Cacao Bliss Balls

peanutbutterblissball.JPG

I made these Peanut Butter & Cacao Bliss balls to accompany the Raw Peanut Butter Cheesecake I made on Friday, but they are so good I made an extra batch the next day to keep in the fridge.   

They are peanuty, chocolatey and sweet. WIN! Plus of course, super easy as everything goes in the blender and you just blitz until you get the right consistency. 

I suggest also blitzing up about 1/4 cup peanuts to use to coat them once you've done rolling them into even sized balls. 


Peanut Butter & Cacao Bliss Balls

Ingredients

1/2 cup peanuts
1/2 cup raw cashews or almonds
1/4 cup coconut
1 heaped TBS Pics peanut butter
1 TBS cacao powder
1 TBS cacao nibs (optional)
1 TBS pure maple syrup
6 large medjool dates, soaked in boiling water for about 5 mins

Drain your dates but keep the water in case you need for consistency.
Add everything into a blender and blitz until well mixed.  Test mixture to see if ok to roll, if not not sticky enough, use water from the dates 1 TBS at a time until you get the right texture for rolling. 
Roll into balls and roll one half into some blitzed peanuts (to make a peanut crumb).  I had some chocolate ganache which I drizzled over as well. 
Pop into the fridge in an airtight container to set. 

Raw Peanut Butter & Chocolate Cheesecake

peanutbutterrawcheesecake.jpg

I've been wanting to attempt a raw / vegan cheesecake for ages. Whenever I have them out somewhere I always think they taste incredible, but for some reason they intimidated me.
Lets break it down though. Really, all we have here is a base (all in the blender), filling and a simple ganache on top, not dissimilar to all the other slices I make.  

With friends coming over tonight it was the perfect excuse. The hardest part was actually deciding on flavour - next time I will go for blueberry, but for my first try I decided on Peanut Butter using my fave PB from Pics. I spotted this recipe on Julia & Libby's website a while back, all I did was make a few adjustments with the topping, opting for a chocolate ganache layer on top.   I also made some peanut butter and cacao bliss balls to go on top, which I will post the recipe for tomorrow. 

It gets all the ticks from me - it's refined sugar free, choc full of protein with all of those nuts, it's vegan (completely dairy free) and gluten free. 

So lets do this!  Honestly, it was easy and it's SO SO decadent and delicious, perfect for a special occasion or slicing and popping in the freezer to eat piece by piece!

Peanut Butter & Chocolate Cheesecake

Crust

  • 1.5 cup almonds

  • ½ cup raw peanuts

  • 8 medjool dates, pitted and soaked for half an hour in warm water.

  • 1 tablespoon coconut oil, melted

  • 1 tablespoon cacao powder

  • Pinch of salt

Filling

  • 2 cups of cashews, soaked overnight

  • 400 grams coconut cream

  • ½ cup maple syrup

  • ½ cup peanut butter, melted

  • 1/2 cup cacao butter, melted

  • Juice of 1 lemon

  • 1 teaspoon vanilla bean paste

  • Pinch of salt

Chocolate Ganache

  • 3/4 cup coconut milk

  • 1 block dark Ghana whittakers chocolate chopped into chunks

Instructions

  1. Line spring form tin with baking paper. Place all crust ingredients into food processor and pulse until grainy-mixed texture. Press crust down into cake pan evenly and place into the freezer.

  2. Place all cheesecake ingredients into food processor and blend until smooth and creamy. Spread evenly on top of base using a knife or spatula. Place in the freezer for 3 or more hours.

  3. Once the cake is set, make your ganache. Place your coconut milk in a pot and heat on low until it starts to steam - don't let boil.  Once hot, take off the heat and mix in your chocolate which will melt slowly. Fold until the ganache goes glossy

  4. Pour your ganache over top of the frozen cheesecake. I used a squezzy bottle but you can do this however you like. 

  5. Cake is best stored in the freezer.


peanutbuttercheesecake.jpg


Chocolate Dipped Date & Peanut Butter Bites

This honestly could not be easier and it feels so decadent. I like to make up around 10 and pop them in the fridge for an after dinner treat with my peppermint tea. 

Chocolate Dipped Date & Peanut Butter Bites

Photo 5-08-18, 11 07 25 AM.jpg

10 large medjool dates
Some Pics Peanut Butter
2 rows Whittakers dark ghana chocolate

Split your dates in half if they aren't already, and with a knife, fill it with peanut butter.
Put aside.

Meanwhile, in a pot, melt down your Whittakers dark chocolate. You can melt in the pot or use a double boiler, if using just the pot be very careful not to burn the chocolate. 

Once melted, take one date at a time and dip one side or as much as you can get in there without burning your hands!

Pop in a container and into the fridge to set. 

Boosted Berry Coconut Yogurt

berrycoconutyogurt.jpg

You all know I'm a mad, crazy smoothie fan. To me, it's the number one way to get a whole lot of amazing ingredients all in one meal that tastes half decent.  But I understand we don't always feel like smoothies all year round, or every day.  Unless your me, of course.   I have recently started thinking outside of the box when it comes to boosting meals.  Add spinach to things that maybe you wouldn't normally (what could go wrong?), the amazing overnight oats recipe featuring chia seeds, fruit and LSA mix, or just packing in loads of grated veges into meatballs, patties, egg slices etc. You get the message.  

My latest trick is boosting my coconut yogurt, or just plain unsweetened if that's what you like.  I love my nutra bullet and have a tendency to blend everything in sight, so today I got busy experimenting with upping the nutrition in one of my fave things - coconut yogurt. 

The recipe below is really yummy and turns it from being a snack into a meal, I turned it into a bowl so I could add a bunch of toppings, but you could use it as the topping on your oats, granola or dessert - it's that good. 

Think of things that are good for you and experiment with blending them in to the yogurt. I popped in some chia seeds, a banana, some blueberries and topped with a nutty cacao blend and some more blueberries + chia seeds.  I also included some of The Wholesome Co immune health tub blend, which has a berry flavour and was so perfect for this and I know it has so many incredible ingredients to help boost my immunity at this time of year. 

These health tubs are basically natural blends of different ground ingredients designed to help different areas -  she has designed a hormone balancing one, glowing skin, breastfeeding, pregnancy and immunity.  I love this idea because it is just using natural foods to help boost your system and they are so easy to add to your diet via smoothies, baking or as a topping.  I am trying to do this more and more and am on a journey of learning about what different foods can do for you - it's a big wide world!  Of course, you can create these blends yourself or buy specific items to help you with whatever you need, I just like the convenience of getting directly from The Wholesome Co AND ranging from $29.99 and $39.99 I am not sure you could buy all the ingredients for that!

Here's my recipe for my boosted coconut yogurt, feel free to omit the immunity blend, or if you'd like to try, use 'balanceproject' as a code for 15% off.  This is not a sponsored blog by the way, I just love this stuff!

Boosted Berry Coconut Yogurt
1/2 cup coconut yogurt (I used Raglan Strawberry & Acai flavour)
1 banana
1/2 cup blueberries
1/2 cup ice
1 TBS chia seeds
1 heaped TBS immune health blend (see above)
a few TBS almond milk to add moisture for blending

Pop everything in the bullet and give it a whiz!   Add to your fave granola, or top with your fave granola - whichever you prefer. 

Raw Banoffee Bites

This recipe is up there with my absolute faves, like my Raw Salted Caramel Slice (see blog below this one), it is sticky, sweet and even good for you.  This recipe comes from one of my fave little NZ businesses, The Wholesome Co. They specialise in wholesome baking subscription mixes plus wellness tubs. I am a fan. Being that I have a sweet tooth, having some wholesome treats on hand is such a plus for me.  This recipe is from her Wholesome Treats V2 ebook and she has kindly let me share with you all.   I recommend making a batch and popping them in the freezer for when the sweet urge hits!

Raw Banoffee Bites

Base

½ cup almonds
¼ cup buckwheat groats or you can use an extra ¼ cup almonds
½ cup coconut
2 tbsp coconut oil
½ cup dates

Caramel

1 ripe banana
½ cup dates
¼ cup coconut butter or you can use regular butter
¼ cup maple syrup or rice syrup
1 tsp vanilla
¼ cup coconut cream

Topping

100g dark chocolate
1 tbsp coconut oil 

Method

Soak both lots of dates in two separate bowls of warm water for around 10-15 minutes and drain. 

Place the almonds, buckwheat, coconut, drained dates, and coconut oil into a food processor and blitz until combined.

Spoon the mixture evenly into 6 silicone moulds or muffin tin. Or you can make as a slice.

Place the base mixture in the freezer while you prepare the banana layer.

Place the banana, coconut cream, drained dates, vanilla maple syrup or rice syrup tbsp of the coconut butter into the food processor. Blitz until smooth. 

Pour evenly over the top of the base layer. 

Add the coconut oil chocolate into a small pot and melt gently.

Spoon evenly over the bites and return to the freezer. 

The Ultimate Green Smoothie

Give your body what it needs with this sweet & delicious smoothie filled with green good stuff.
A great intro to Green Smoothies.

greensmoothie

Serves 2

1 cup almond or coconut milk
1 x banana
1 x pear
5 x green grapes
1 x golden kiwifruit
1 cup kale & spinach blend
1 tsp chia seeds
1 tsp LSA mix
1 cup ice

Blend until completely smooth and top with some delicious crunchy granola or nuts.

Acai Bowl Recipe

If you are like me, you hear a lot of hype about acai.
Acai bowls seem to be everywhere, well at least all over instagram.  Because I am often searching for healthy, nutritious recipes, the acai bowl features heavily.  So what is acai?  It is a berry found in the Amazon (sounds exotic already) and is deemed a superfood because of the myriad of wonders it does.  The benefits boast aiding digestion, promoting skin health, boosting your immune system, helping your heart and has anti ageing effects. Plus, hell, it's purple. Say no more - I'M IN!

With all this in mind, today I decided to make my own Acai Bowl. It was a hit (with me) and I'm pretty sure Acai will become a regular superfood in our household. First up you are going to need some Acai Powder. I opted for an organic powder by Goodhealth, which is stocked at my local small town pharmacy.

I played around for a little while today to see what worked, and came up with a really delicious bowl for lunch. Feel free to play around and put your favourite toppings on, be your own experiment and enjoy!  In my very short Acai Bowl career I have learned that for a successful bowl, you need a creamy, thick smoothie base and some nice textures on top, think crunch and texture.

Acai Bowl Recipe

Blitz together the following:
1 x banana
1/2 cup fresh or frozen strawberries
1/2 cup fresh or frozen blueberries
2 Tablespoons acai powder
1 Tablespoon nut butter (I used Peanut Butter)
Up to 1/2 cup coconut milk or almond milk (adjust amount until you get a creamy, thick consistency)

Pour into a bowl and then have some fun decorating! 

Toppings:
Blueberries & Banana or other fresh fruit
A crunchy nut & seed cereal or granola - I love Cathedral Cove Raw Paleo Super Cereal
Almonds
Chia Seeds
Goji berries
Coconut
More nut butter if like me, you love it!

Let me know if you have a favourite acai bowl recipe, I'd love to see how everyone uses this wonderful superfood.

J xx

acaibowl.jpg


Pancake Sunday! A DF/GF/SF Recipe to Save.

IMG_7703.JPG

We love pancakes in this house. It's been a long standing tradition to have pancakes (or waffles) on Sunday.  We had a great recipe for good old fashioned pancakes with white flour & sugar.

When I started changing my lifestyle and eating, pancakes disappeared from the menu for a while - until I decided to experiment with some healthier versions.   I consulted Google and found a recipe by The Paleo Running Momma and decided to try my own from scratch. Instead of white flour, a tapioca flour and coconut flour mix is used, along with mashed banana, eggs and coconut milk.   SUCCESS!   These Paleo banana coconut flour pancakes are so perfectly fluffy, moist and sweet that you won't believe they're grain free, dairy free, and refined sugar free!

They were light, fluffy, rose well and absolutely delicious. The boys downed them pretty quick, I was so happy with them. Below is the recipe, which is the original from Paleo Running Momma with only 1 small change (I used rice malt syrup instead of maple).

Please don't assume that just because these are 'Paleo' that they aren't as good as 'the real thing'. Give them a go. It's a great alternative if you're GF or are trying to stay away from white flour - or even if you're not.

I get creative with toppings - some of our faves are fresh cut fruit salad with coconut yogurt, frozen berries heated in a pan for 10 mins and poured on top (YUM) and todays experiment was banana, pear and peanut butter.  They are wonderful plain with maple syrup too.

Here's the recipe!

Paleo Banana Pancakes

Ingredients

  • 3 eggs

  • 2 small/med overripe bananas mashed well

  • 1/2 cup almond or coconut milk

  • 1-2tbsp pure maple syrup

  • 1 tsp vanilla

  • 6Tbsp coconut flour

  • 3Tbsp tapioca flour (buckwheat flour also works well)

  • 1/2tsp baking soda

  • Pinch salt

  • coconut oil for greasing pan/griddle

Instructions

  1. Whisk together all wet ingredients. Combine the dry ingredients separately, then add them to the wet mixture and stir until well combined and smooth.

  2. Heat a fly pan over med low/med heat. These pancakes will cook more evenly if they cook on a lower setting for a bit longer.  They will burn if too hot!

  3. Coat the pan with a thin layer of coconut oil, no too much, since you will add more after each batch.

  4. Spoon the batter by about 3-4 tbsp carefully into the hot pan and smooth into an even circle, 3-4 inches in diameter. Do not crowd! You can keep the cooked pancakes on a parchment lined baking sheet in 200 degree oven until ready to eat.

  5. Allow each pancake to cook on one side until edges are dry, bubbles form on the surface and the bottom is deep golden. Carefully flip and cook the second side until golden. Repeat for all pancakes, greasing the pan lightly with coconut oil between batches and adjusting the heat as necessary.

IMG_7697.JPG


The Best Raw Chocolate & Salted Caramel Slice!

I have been experimenting with buying raw treats over the past 7 months and discovering a whole new world of amazing refined sugar free treats.  I've made some as well as I love to have a little stash in the freezer!  I must confess that pretty much all of the slices I have tried have been really really good - both made and bought, much better than I expected.  If you've ever doubted that raw can be as good as 'the real thing', then you absolutely need to try and see for yourself!

Of all my experimenting, the one that always gets me, no matter where I buy it from, is a caramel & chocolate slice or peanut butter and chocolate protein slice. Holy moly, caramel made from dates and coconut cream is out of this world good.

After dabbling with a few basic raw recipes I decided it was time to try the cream of the crop - a trip layer caramel slice.   It's delicious, utterly drool worthy and not as hard as I expected. Want to give it a go?  Here's the recipe, adapted from The Merrymaker Sisters. I'm gutted I didn't get any photos side on, and to be honest mine was a bit slapstick as I was in a rush - but in an ideal world, you should be three definite layers.

PS - Remember this is a treat and not something you should go crazy on.  Although refined sugar free, these types of slices are still high in natural sugars, so something you should eat in moderation.  Good luck with that!  Pop it in the freezer so that you don't get tempted to eat all at once.

Salted Caramel Choc Slice


For The Base

  • 1/2 cup cashews

  • 1/3 cup almond meal

  • 3 tbs. coconut oil

  • 2 tbs. cacao powder

  • 1 tbs. 100% maple or rice malt syrup

For The Caramel Filling

  • 1 1/2 cups dates

  • 1/2 cup coconut milk

  • 1/2 cup coconut oil

  • 1/2 tsp. Himalayan pink salt

For The Choc Topping

  • 1/2 cup coconut oil

  • 2 tbs. cacao powder

  • 1 tbs. 100% maple or rice malt syrup

  • 1/2 tsp. pink Himalayan salt (optional)

Method

  • Line a 20 x 10 cm (8 x 4 inch) loaf tin with baking paper.

For The Base

  • Place all the base ingredients in to a food processor (we use our Vitamix). Whiz until well combined, it will be a little sticky and crumbly.

  • Press this mix in to the prepared tin, ensure it is pressed evenly.

  • Place the tin in to the freezer to set

For The Caramel Filling

  • Using the food processor (don't worry about washing it) place all the caramel filling ingredients and whiz until completely smooth (it will take around 5 minutes).

  • Pour this delicious mixture over the top of the base and return to the freezer.

For The Choc Topping

  • Using the food processor (again, don't worry about washing it) add the raw cacao, coconut oil and maple syrup, mix until completely smooth.

  • Pour the choc topping over the caramel filling, shake the tin slightly to even it out. I gave it a bit of a swirl!

  • Sprinkle with Himalayan pink salt if you like things extra salty.

  • Return to the freezer for about 1 hour or until completely set.

  • Once set, cut into slices and store back in the freezer!

rawchoccaramelslice

4 Must Try Chia Pudding Recipes!

There are a few things that have become absolute staples in our house over the past 9 months, and chia pudding is one of them. So simple, easy and yummy.  Plus, did you know Chia seeds are higher in Omega 3 that Salmon? Super duper good for you. They also absorb liquid, so you can pretty much create any flavour you want with liquid - and then just add the chia seeds to give it bulk.

I have made many renditions of Chia Pudding, you can literally do anything, and I have.

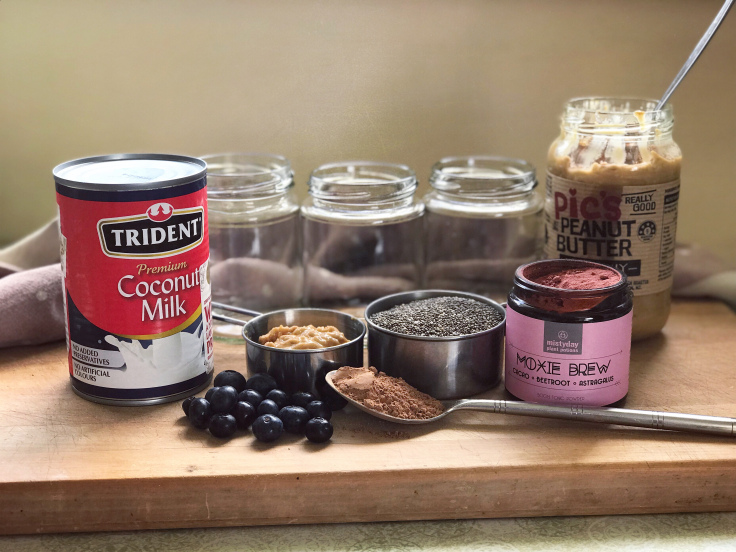
I've come up with a few absolute favourites that I'm going to share below, but first things first - I'm going to give you a recipe for a basic, plan vanilla pudding, and then you can use that as a foundation to build on.   You can't go wrong with Blueberry or Chocolate Peanut Butter, plus I've just made a special edition pud using Misty DayPlant Potions tonic powder.

Which will you try first?

chia.jpg

Basic Chia Pudding

2 cups coconut milk (unsweetened)
1/2 cup chia seeds
1/2 tsp maple syrup or rice malt syrup
1/2 tsp vanilla
1/4 tsp cinnamon

Blitz or whisk together everything except the chia seeds. Once blended, add the chia seeds and whisk again.
Pop in a jar and refrigerate for an hour.

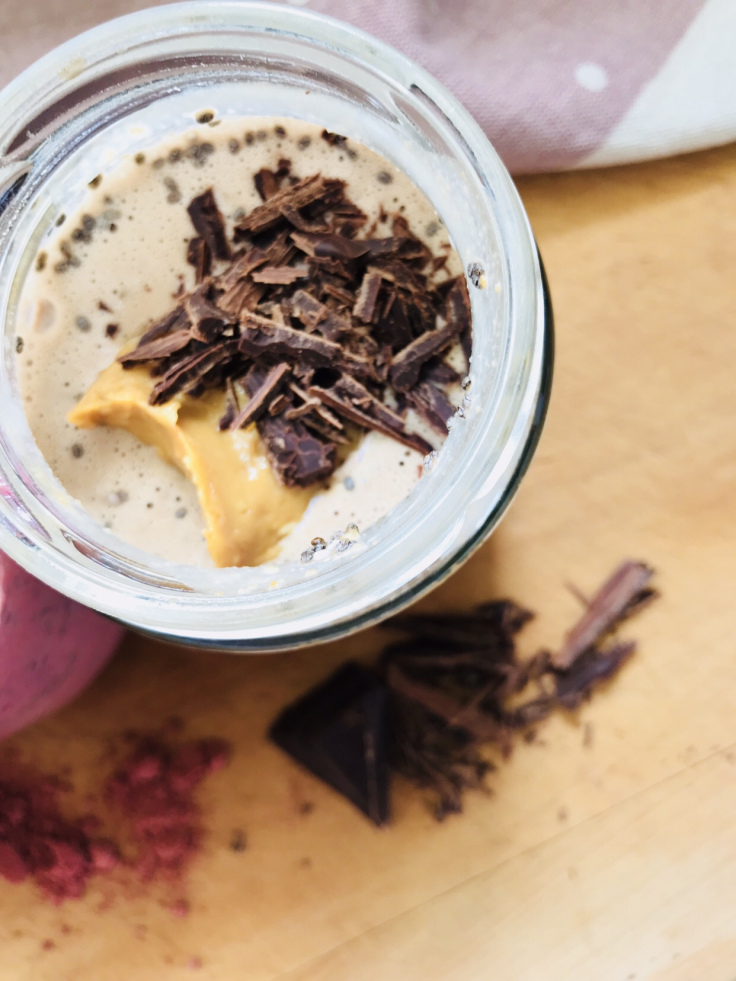
Chocolate Peanut Butter Chia Pudding (my fave)

2 cups coconut milk (unsweetened)
1/2 cup chia seeds
1/2 tsp maple syrup or rice malt syrup
1/2 tsp vanilla
1 TBS cacao powder
1 TBS natural peanut butter

Prep your jar(s) by putting a little peanut butter in the bottom.
Blitz together coconut milk, syrup, cacao, vanilla and peanut butter.
Add chia seeds and mix with a whisk, pour into jar on top of the peanut butter.
Refrigerate for an hour

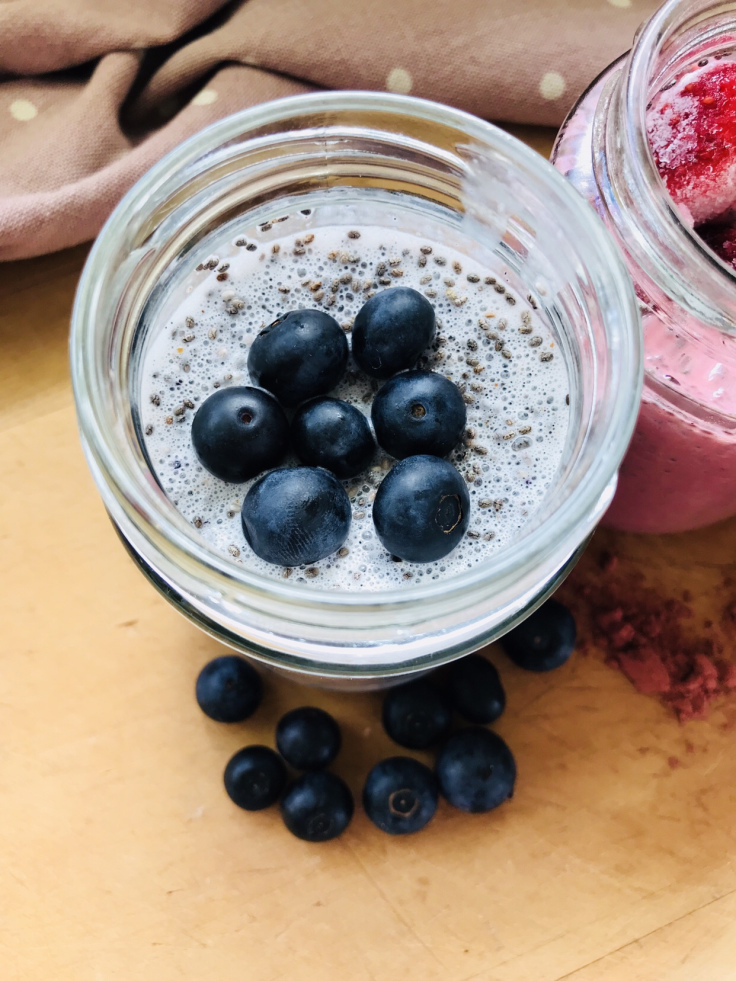
Blueberry & Vanilla Chia Pudding (Aiden's fave)

2 cups coconut milk (unsweetened)
1/2 cup chia seeds
1/2 tsp maple syrup or rice malt syrup
1 tsp tsp vanilla
1/2 cup blueberries

Prep your jar(s) by putting a 1/4 cup blueberries in the bottom.
Blitz together coconut milk, syrup, vanilla and and 1/4 cup blueberries. Save a couple to go on top!
Add chia seeds and mix with a whisk, pour into jar on top of the whole blueberries.
Refrigerate for an hour

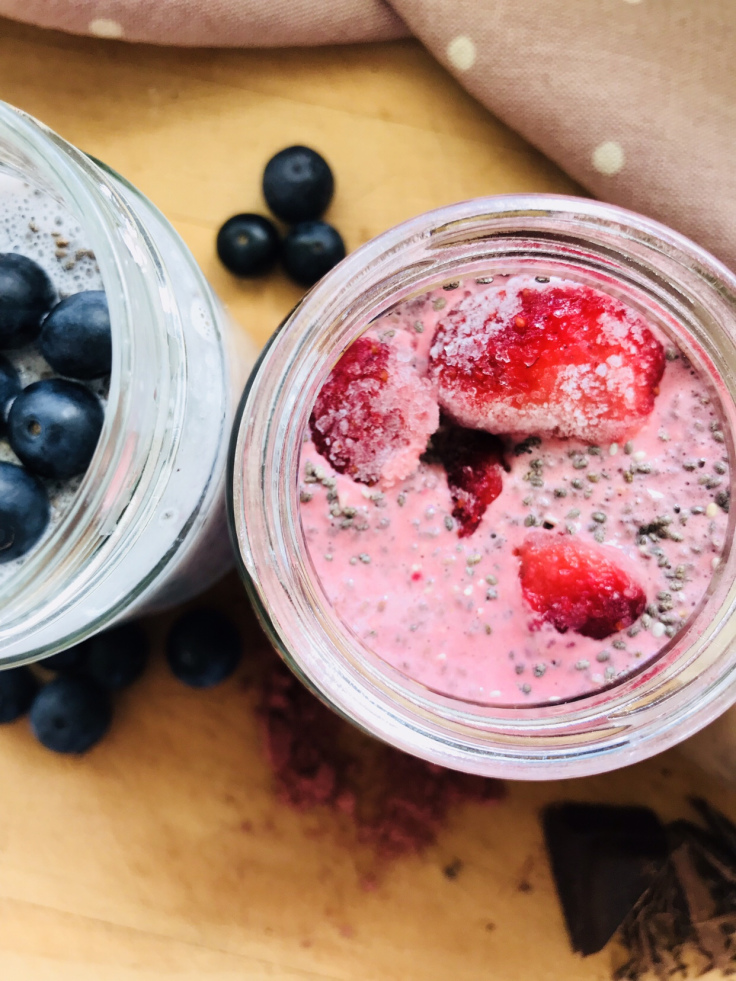
Misty Day Chia Pudding with Strawberries

2 cups coconut milk (unsweetened)
1/2 cup chia seeds
1/2 tsp maple syrup or rice malt syrup
1 tsp tsp vanilla
1 TBS Misty Day tonic
* I used 'Moxie Brew' which is cacao, beetroot & asparagus
1/4 cup frozen strawberries
Blitz together coconut milk, syrup, vanilla and the tonic.
Add chia seeds and mix with a whisk, pour into jar and place some strawberries on top - they will sink, this is fine.
Refrigerate for an hour

Roasted Moroccan Chickpea, Cabbage & Broccoli Salad

Hot summer days mean salads for dinner in our house, and I admit, I'm not the most original in my salads usually (green salad anyone?), so I have been experimenting with new salads over the past month and this is one of my new faves.

This salad is simple, refreshing & tasty.  You can change up the flavour by mixing through whatever salad dressing you think will go with it (would be lovely with a creamy dressing) or I have popped a basic recipe for a lemon dressing that I really like.My advice would be to not add the dressing until you are serving, as the chopped salad stays fresh in the fridge for 3 days without the dressing. Just add dressing as you serve.

Make it is easy, and just two steps - quick chopping of the raw ingredients, and roasting up the crunchy stuff  in the oven.

Chickpea, Cabbage & Broccoli Salad

Ingredients

For the oven:
1 cup chickpeas
1/4 cup chopped almonds
1 TBS Moroccan seasoning

For the main salad:
1/2 Red cabbage finely chopped
1 x head Broccoli finely chopped
1 x Carrot grated
1/2 avocado
Fresh baby spinach leaves

First, prepare the chickpeas and almonds. If using canned chickpeas, drain and dry with a paper towel. In a bowl, toss in olive oil and mix through the morroccan seasoning.
Place the chickpeas on a lined baking try and add the almonds. Bake for 15-20 mins at 180 degrees.

Next place the salad ingredients in a bowl for serving.  You can use any dressing you fancy or have handy, I make the following and it's super yum, simple and quick.
Mix up the following in a bowl; extra virgin olive oil, whole grain mustard, lemon juice, salt and pepper

Top your salad with the roasted chickpeas and almonds, and enjoy!

moroccanchickpeasalad

Raw Vegan Lemon & Coconut Slice 

Those of you who follow me on instagram, when it comes to food, know three things for certain  - I love smoothies, I have a sweet tooth and I love Cathedral Cove Naturals products. 

It started with the paleo cereals to put on my smoothies or bowls for some crunch, and then I discovered the coconut yogurts. I love yogurt, and when I started focusing on my health and the amount of refined sugar I was having, I really struggled to find a dairy yogurt that was good for me.  The lowest I could find was 6g of sugar per 100g, which is actually not too bad really and I made do with that for a while.    

Then I found  Cathedral Cove natural yogurt, how could this creamy goodness taste so good and be so low in sugar? There is only 1g of sugar per 100g and it literally has two ingredients - coconut cream and probiotic cultures. That's it.  

I use it primarily as a topping or base - combine the yogurt with their cereal and some fruit and you've got heaven in a bowl (see my instagramfor photos!) They also have several other flavours if you're wanting something more decadent, the raspberry and chia one is my absolute fave (this one is slightly higher in sugar). 

After following them on instagram I've seen there are a lot of clever ways to use coconut yogurt, including raw baking. One slice caught my eye so I decided to make it yesterday. This recipe comes from their website and is really really delicious and super simple!  

Make it and let me know what you think! 

Ingredients

Base

1 Cup of Desiccated Coconut

1 Cup of Mixed Nuts (we used cashews and macadamias)

2 Tbs of our Raw Organic Coconut Oil

2 Tbs of Coconut Butter (or nut butter of choice)

1 Tsp Cinnamon

½ Tsp Ground Ginger

Filling
1 Cup Natural Coconut Yoghurt

1 Cup of Raw Cashews (soaked overnight)

Zest and juice of one large Lemon

3 Tbs of Pure Maple Syrup (or sweetener of choice)

½ tsp of Vanilla Powder

Garnish (optional)
Handful of chopped Mint, Zest of one Lemon, Chopped Macadamias

Freeze dried Strawberries

Instructions
Firstly, line a square baking tray or container with baking paper. 

To make the base add all of the ingredients into a food processor and blend until everything is combined. The mixture should be able to come together easily. Place the base mixture into the baking tray and press down firmly. Transfer to the freezer while you make the filling. To make the filling add all of the ingredients into a high-speed blender and blend until the mixture is smooth. Pour the filling on top of the base layer and put back into the freezer to allow it to set over night or for 4-6 hours. Once this layer has set you can garnish it with the mint, lemon zest, macadamias and freeze dried strawberries. Prior to serving place the slice in the fridge for a couple of hours to allow it to soften.

rawlemoncoconutslice

Raw Chocolate Peppermint Crunch

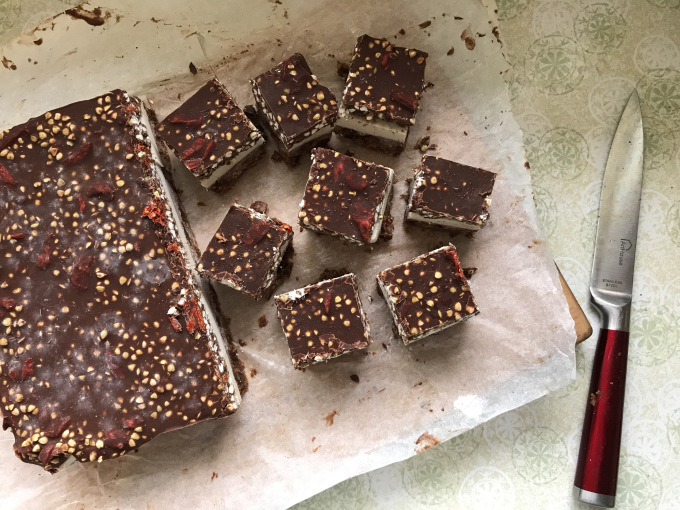
Recipe from Dr Libby's Sweet Food Story

I'm all about that sweet life. Even with balancing out my diet (and no doubt my hormones) I like to have something a little sweet now and then.

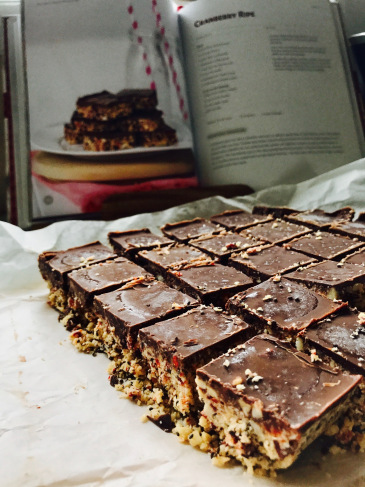
This is slightly more effort than the Cranberry Ripe recipe I posted a week or two ago (see recipe HERE) but it is definitely more decadent too. It's best kept in the freezer in small portions, just pull out a piece when you need a pick me up or want a treat. If you let it defrost ever so slightly the middle layer goes all gooey and melts in your mouth.  YUMMO!

Sweet things never used to be safe in the house with me around, and I'm loving that I'm not having the same cravings I did before.

If you're not confident with raw baking, below are some step by step photos to help you along. Well worth the effort.   Note: I got almost all of the ingredients from Binn Inn

Chocolate Peppermint Crunch

Ingredients

Base
1 cup raw almonds, soaked overnight then rinsed well
1 cup desiccated coconut
1/4 cup filtered water
1 cup dried dried dates
1/4 teaspoon cinnamon
1/3 cup cacao powder
pinch of salt

1.combine all of the base ingredients in a food processor and pulse until well combined and sticky.
2.Line a slice tin with greaseproof paper, press the base mixture into it evenly and place in freezer to set.

White Peppermint Filling
1 cup raw cashew nuts, soaked overnight and rinsed well
1/2 cup coconut cream
2 tablespoons honey
1 tablespoon lemon juice
6-8 drops peppermint essence
pinch of salt

3.To make the peppermint filling, combine all ingredients in a high speed blender and blend until creamy and smooth. Pour mixture over base and return to freezer to set until very firm.

Chocolate Topping
100g cacao butter, melted
1/4 cup cacao powder
1/4 cup maple syrup
1/3 cup goji berries
1 cup dehydrated buckwheat groats (Binn Inn have these)

4.To make the chocolate topping, combine the cacao butter, cacao powder, maple syrup and salt in a bowl and whisk until well combined. Add the goji berries and buckwheat and mix well. Pour chocolate over the set filling and base. Place in freezer until completely set.

rawchocperppermintslice

Egg & Vege Slice

We have a few staples in our house that have been around for donkeys years. We all have them, reliable family favourites that you make time and again. One of our favourites is Egg Slice. I started making it when I was pregnant as freezer meals as it freezes so perfectly and you can pack so much into it. Even when I make it now I usually double up and freeze one for when I can't be bothered to cook!  The vegetable content is dependant on whatever is in my fridge at the time, you can switch out any veggies for your family faves.  Usually added to the below I would have capsicum/peppers and zucchini as well.

You will get better taste if you use free range eggs. We are lucky to have 5 chickens on our property who lay the most amazing eggs, Aiden likes to go and collect the eggs before I make it and he often helps as it's a very quick and easy recipe.  It should take no more than 45 mins including the 30 min bake time.

As I'm trying to stay away from higher carbs, I decided to try making it with almond flour instead of plain white flour and low and behold, it was BETTER than the original. WIN!  I wrote down the winning recipe straight after dinner, here it is!

Really yummy served with avocado or fresh tomatoes, or side green salad.

Egg & Vegetable Slice

6-8 free range eggs
1/4 cup oil

Roughly 2 cups chopped veggies of any variety.
I used:
1/2 cup Brocoli
1/2 cup Cauli flower
1 grated carrot
1/2 tin corn kernals (no sugar added)
1/2 onion
1/2 cup almond flour
3/4 teaspoon baking powder
salt and pepper to season

Method:

  1. Preheat oven to 180 degrees celsius, line your dish with baking paper (no mess after!)

  2. Whisk together wet ingredients

  3. Combine veges with dry ingredients

  4. Mix wet ingredients into dry, stir well

  5. Pour into prepared dish and bake for 30 mins

Enjoy!

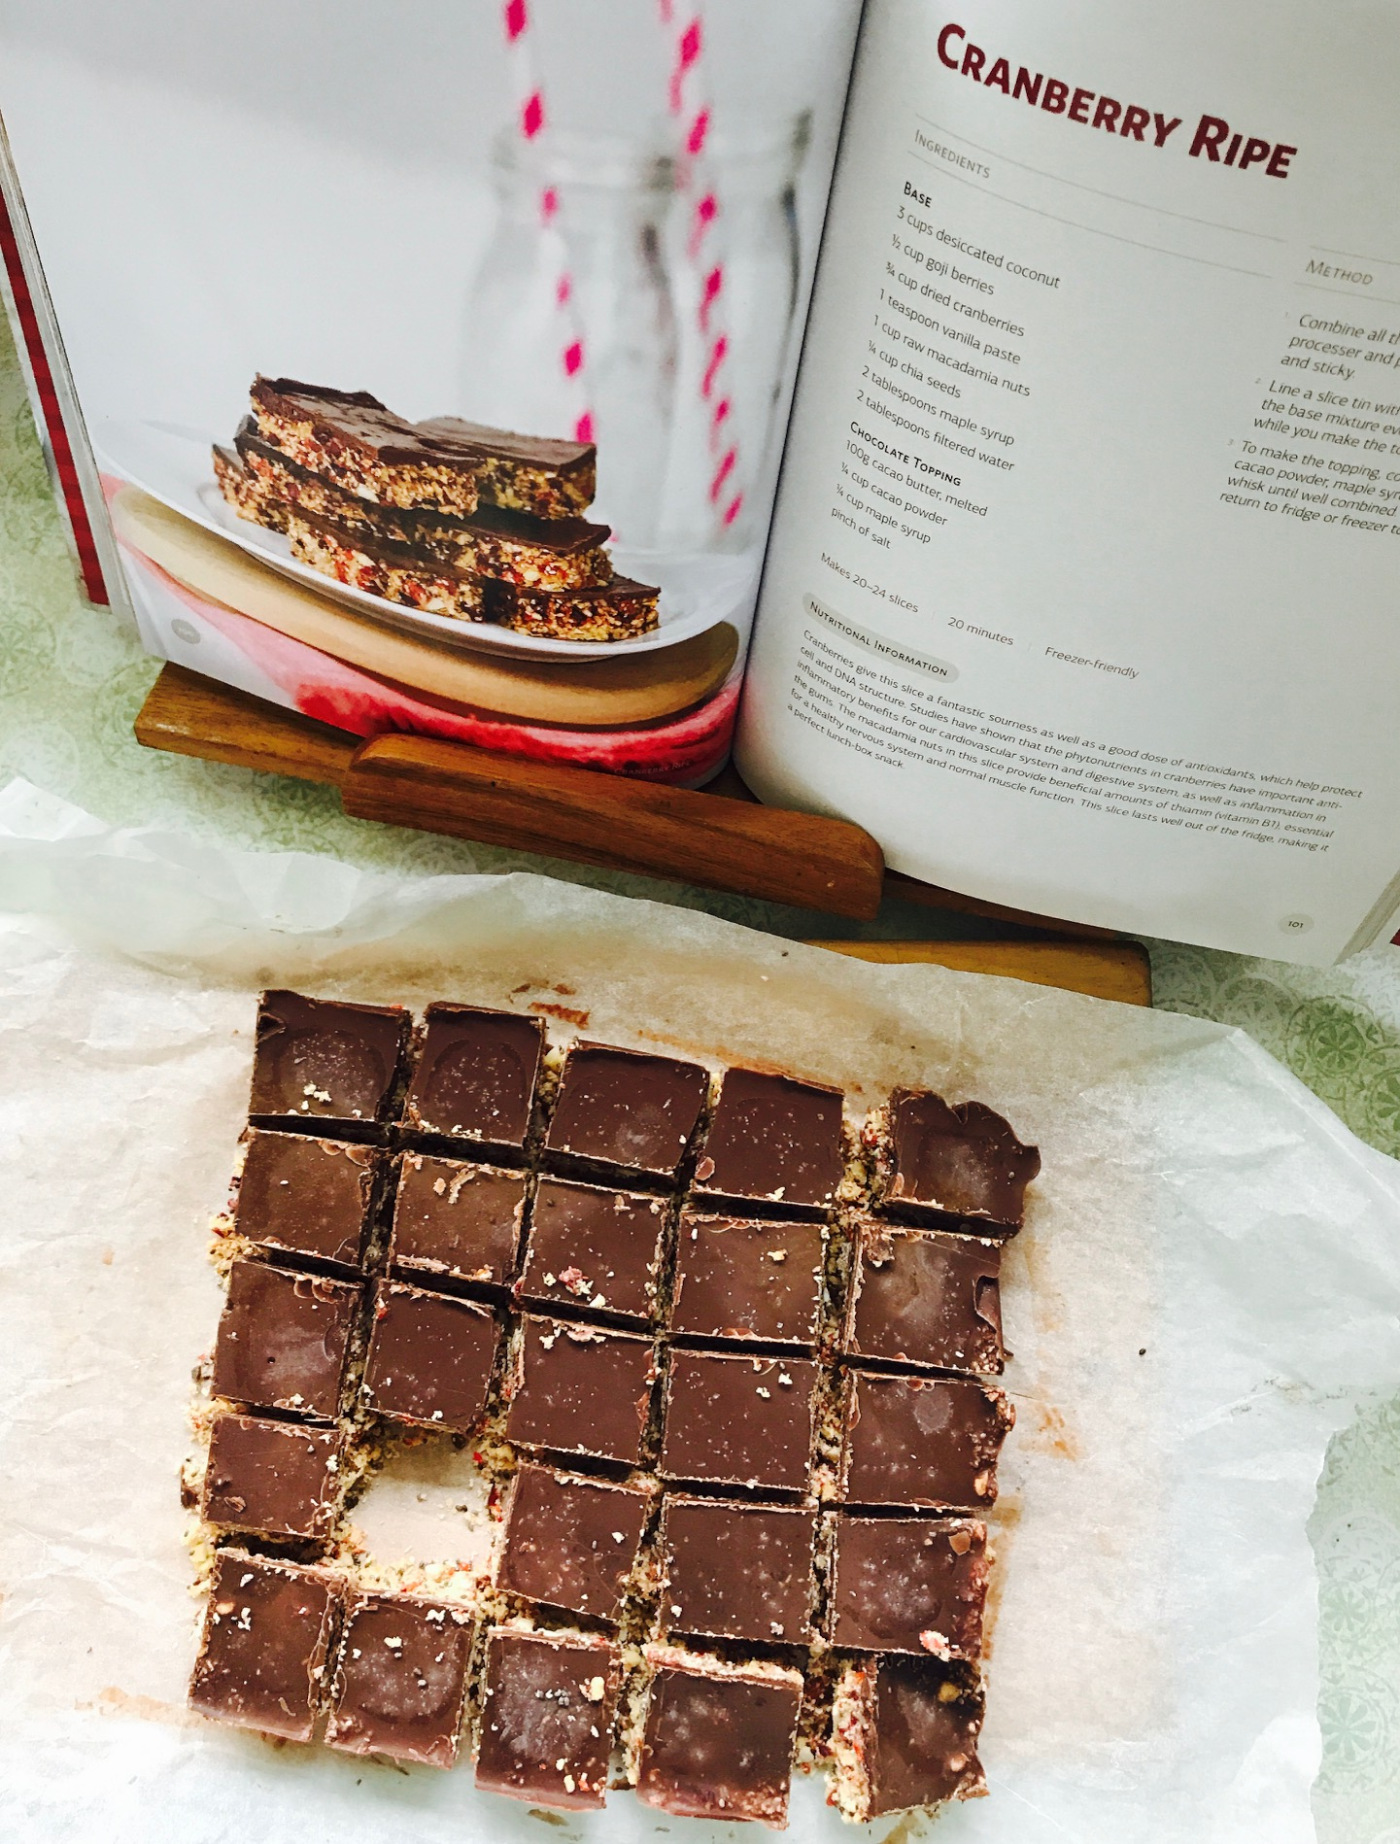
Recipe - Cranberry Ripe

I have been discovering some amazing recipes and new tricks in the kitchen lately.  If you know me already, you know I love to bake, I even owned a baking business for a few years.  I think my love of baking originally came for my love of sweet things, and wanting to recreate sweet treats that I had seen or had at a cafe.   Nothing has changed really!

At the Total Health Explosion event in New Plymouth last weekend I tried some raw treats from Raw Balance.  They were GOOD. Seriously good. I couldn't believe they were so delicious!  So I came home thinking 'I need to learn to do that'.  I had totally forgotten that I had purchased a Dr Libby recipe book a few years ago (with good intentions) but never actually made anything from it.  I think that 'raw food' has always intimidated me a bit, I'm more familiar with traditional baking - flour, sugar, butter - you could say it's my comfort zone.

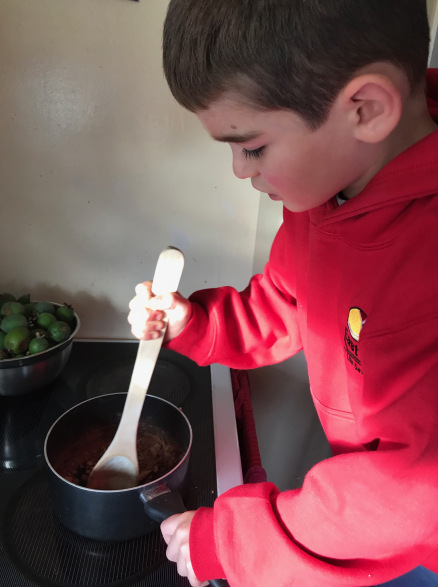
Well, I am happy to report my first attempt was a success (bulging eyes from Aiden and two thumbs up) and I couldn't believe how easy it was. Only 3 steps, and Aiden helped.
I think some recipes can be more labour intensive than others, but if you're like me and want to give something a try, this recipe is the perfect first step.

There are a few staple ingredients you will need that you may not have at home - don't let that intimidate you!  I went to my local Bin Inn and bought some things I'd seen recurring on several recipes, and now they are in my pantry ready for my next experiment.

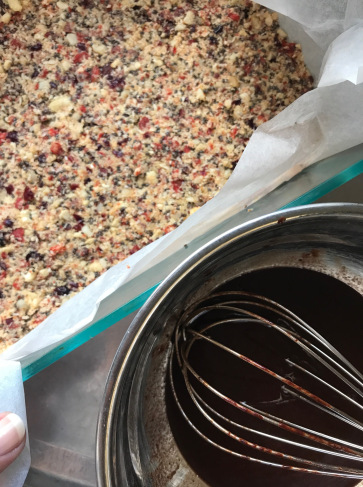
Give this a go and ENJOY!  I've included a few photos to help you.

This recipe is best kept in the freezer in small portions to pull out when you need a sweet treat.

CRANBERRY RIPE

For the base:

  • 3 cups desiccated coconut

  • 1/2 cup goji berries

  • 3/4 cup dried cranberries

  • 1 tsp vanilla paste

  • 1 cup raw macadamia nuts

  • 1/4 cup chia seeds

  • 2 tbsp maple syrup

  • 2 tbsp filtered water

For the Topping:

  • 100g cacao butter, melted

  • 1/4 cup cacao powder

  • 1/4 cup maple syrup

  • pinch of salt

  1. Combine all the base ingredients in a food processer and process until well combined and sticky.

  2. Line a slice tin with greaseproof paper and press the base mixture evenly into the tin. Refrigerate while you make the topping.

  3. To make the topping, combine melted cacao butter, cacao powder, maple syrup and salt in a bowl and whisk until well combined. Pour over the base and return to fridge or freezer to set completely.